Friday, June 13, 2008

Return a single row number for each record in a table

This article is by far smaller than other ones, but it is easier as well and is actually a part of a second one about performing row-by-row operations on a single table... and I hope those articles should be usefull for you. First, Let's considrer the following Query:


Select * from Facility


The results, are these ones, as expected...


If you run this query in your SSMS (SQL Server Management Studio, if you are unfamiliar with the acronym) , you usually will see every single row in the Facility table, and even in the messages pane there is a little hint of how many rows where selected alongside with all of the results brough by the aforementioned query, but you do not have a "selectable" column that could be used to identify each row. You can think about using a primary key or index, but in this case we are talking about Identifiying a single row rather than a single record. So, we need to add something to this query: The row_number() function.
row_number() returns a bigint representing the sequential number of an individual row within a table or a partition of it (we'll discuss this later because it will in fact number in a different way in each case). As you noticed so far, this function is used for sequentially number the rows resulting from a select statement.

Now, here is an example of a row_number() function:

Select row_number() over (order by FacilityID) as [Row #],* from Facility


Now, By doing this, you will get something like this:


As you noticed, the syntax of a row_number() functions includes an over clause, this is part of the function. The order by argument is used to determine the sequential order in which each row is being shown. If we modify our previous example as follows:

Select row_number() over (order by FacilityName) as [Row #],* from Facility


These will be the results:


You will now notice the difference between the two examples immediatly!

You may be asking yourself "What is the catch with all this stuff??", well, If you want to know do not miss the next part of this article: The cursor Curse. Stay tunned and have fun!

Dr. Osorio

Monday, June 2, 2008

Creating a string connection from the scratch

Sometimes you need to connect to a certain database or create a connection in your program to a database server. If you are like me, surely more than once you have found yourself struggling with the need of create a connection string… but you do not know the necessary parameters to make possible that connection. But, there is an easy way to put that connection to work.

What Tools you’ll need.
* A command prompt window
* The ODBC or OLEDB drivers installed the ones to connect to your database.

How to create the connection
First, run a command prompt: Click the Start menu, then click run the option, type cmd in the open text box and hit the enter key.


Now you will see a command prompt, by default the command prompt is positioned in your profile’s folder. Let’s change to the desktop folder, so it will be easier to work and locate any files you create.


To switch to your desktop directory type cd desktop at the cursor’s position. Once you switched to desktop folder, you will need to create a special file that in fact will contain the connection string you need, to create that file type the following command:

copy con mystring.udl


The cursor will go to the next line, by now, we will leave this file blank so do not type anything here, just hit the F6 key followed by enter. In the picture below this lines you will notice a message saying that the file was successfully created.


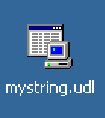
Now you will see a new icon in your desktop (if you have not noticed it) it should look like the picture below, that is a data link file.


So far, we just created a file but we have not touched your connection srting… be patient, because the next steep is to get your connection string right from that file, but how will we do that if you created an empty file??? Well, first double click the icon I showed you few moments ago in this article, it will pop up a new window similar to this one, for this example, we are going to choose Microsoft OLE DB Provider for SQL Server.. of course you will choose later the appropriate OLE DB driver according to the database server. Now hit next >>


Now, fill the information in the next page as needed, this is an example of how you would do it for SQL Server using windows integrated authentication, after filling the blanks, make sure to click the Test Connection button. If it successfully connects to your database, click OK.


Now right click the same icon an pick the open with… option from the context menu, this will pop up a window to choose an application to open the mystring.udl file. In that window you will choose Notepad and before clicking OK make sure that the checkbox below the program list stays clear. See the image below


Once you clicked OK a notepad window will open and there you will find your connection string. Copy it to your program and modify it as needed.


Sunday, June 1, 2008

The Virtualization paradigm

Maybe the word "virtualization" does not give out a clue of its actual meaning by itself, and even if it is not clearly defined at all. Some time ago I found an interesting concept about virtualization and now I have several servers running in my home computer as separate computers sharing the same hardware resources, this option is called VMWare and you can find detailed information about it at http://www.vmware.com/ but in this brief article I will discuss the concept of virtualization used by vmware and how you can get it to work.

Disclaimer
Vmware is a programt that emulates a real computer within your current hardware, this means that it will consume computer's resources (RAM, Hard Disk space, processing time and so on) needed to have a "real" computer working in your computer and even you will need to "install" an operative system to your new virtual machine. I am not responsible for any consecuence of this behavior.


Where do I get it?
Vmware can be downloaded for free at its own website http://www.vmware.com/ but be aware that this is not a trialware it is really free! and there are also other software solutions in the same web site that are not for free. In the same download page you must fill out a form in order to get your copy of vmware and an activation code that you will need to activate your copy. By now I am not including a picture of the download site since doing so I could have legal problems! , try keeping your activation code on hand, you will need them soon because if you do not have it, you will not be able to run any virtual computer you create in vmware.


Running Vmware
Once you get vmware installed in your computer, let's take a quick look on it. Click the Start menu on your windows and then point to Run, type vmware in the run dialog box, just like the image below


Now hit Enter to execute vmware, and then we'll activate it. Once vmware is running you will get the user interface, depending on which version you got, your screen will look very similar to this one:


Now you should click in the vmware host that apply to your scenario, in my case I run the vmware hosts on my personal computer, if it is your same case or you are planning to run the same scenario then you should select Localhost as your vmware host.


Activating vmware.
This step must be taken if this is the first time you have vmware working. Do you remember the activation code you got from the vmware website? well, now it's time to use it! Click the Help menu and choose enter serial Number. By doing so, you will get the activation screen where you will enter your activation code. Remember, without an activation code you will not be able to start any virtual machine you create. See the images below.


Now enter the serial number and all other information needad an click OK. Your vmware is now ready to go!


Creating a Virtual Machine
A virtual machine is in fact too similar to a real computer since it has hardware resources as well, but it's virtual because the hardware resources used here are the ones from your server or personal computer , that is an important saving because if you need a server for running an specific application you are not purchasing extra servers, but the drawback here is that you need a powerfull machine able to resist all the streess comming from the virtual machines. To create a new virtual machine you must run the respective wizard, to start the wizard click on New Virtual Machine.


I will not cover all the specific tasks that you can get done with vmware because this is not an extensive tutorial to use vmware, but if I tell you every detail of using it, what fun will you have without any investigation? the best way to learn a wide array of things is trying by yourself, it's cheap, exiting, and fun!
See you Later!!
Dr. Osorio